This is part three of a series of blog posts on using the WPF list box. In this post you learn to use data triggers allow you to change how each row is presented based on data in your data source. You can use a single trigger or multiple triggers depending on your needs. You are also going to build a converter class to accept two or more pieces of data and the return value is used as a data trigger.
Before reading this blog post, it is recommended you read my blog post Using WPF List Controls - Part 1 so you can learn about the data layer used in this blog post and review how WPF list controls work.
Single Data Trigger
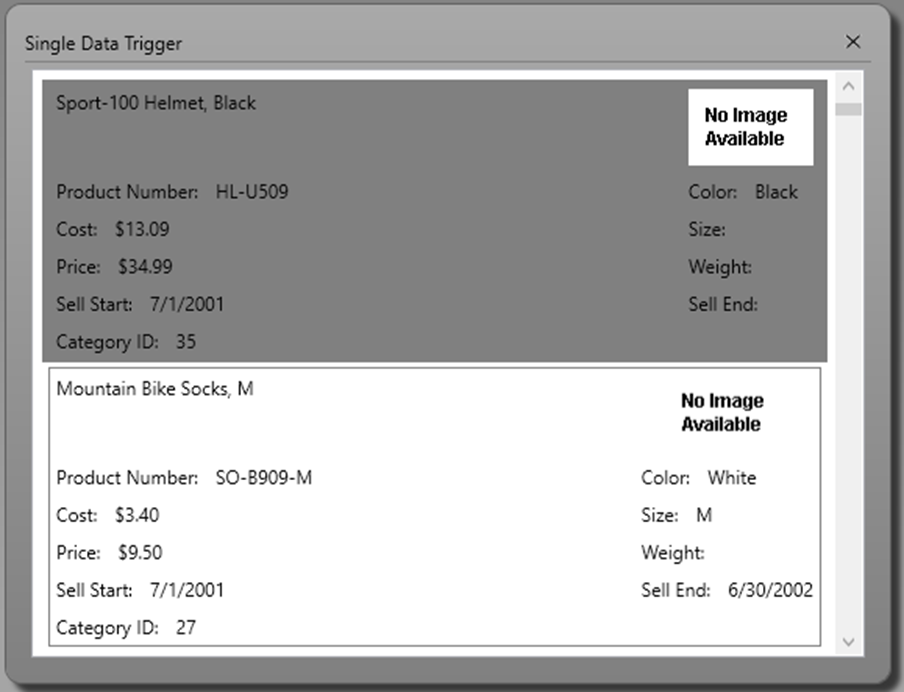
A data trigger in WPF allows you to modify a property, or properties, of a UI element based on some data contained in your result set. For example, in our list box of product data, there is a property named SellEndDate. Some of these values in the SellEndDate field are null. If a value is null, highlight that record in the list box by changing the background color of that row. A data trigger allows you to setup a binding to the SellEndDate property and the value it should be equal to. If that condition is met, you can write XAML to change the UI. For example, in the data trigger shown below, the background color is changed to "Gray" as shown in Figure 1. Data triggers are placed into the <Style> element with your other styles for your UI element.
<Style TargetType="ListBoxItem">
  <Setter Property="HorizontalContentAlignment"
          Value="Stretch" />
  <Style.Triggers>
    <DataTrigger Binding="{Binding Path=SellEndDate}"
                  Value="{x:Null}">
      <Setter Property="Background"
              Value="Gray" />
    </DataTrigger>
  </Style.Triggers>
</Style>
Multiple Data Triggers
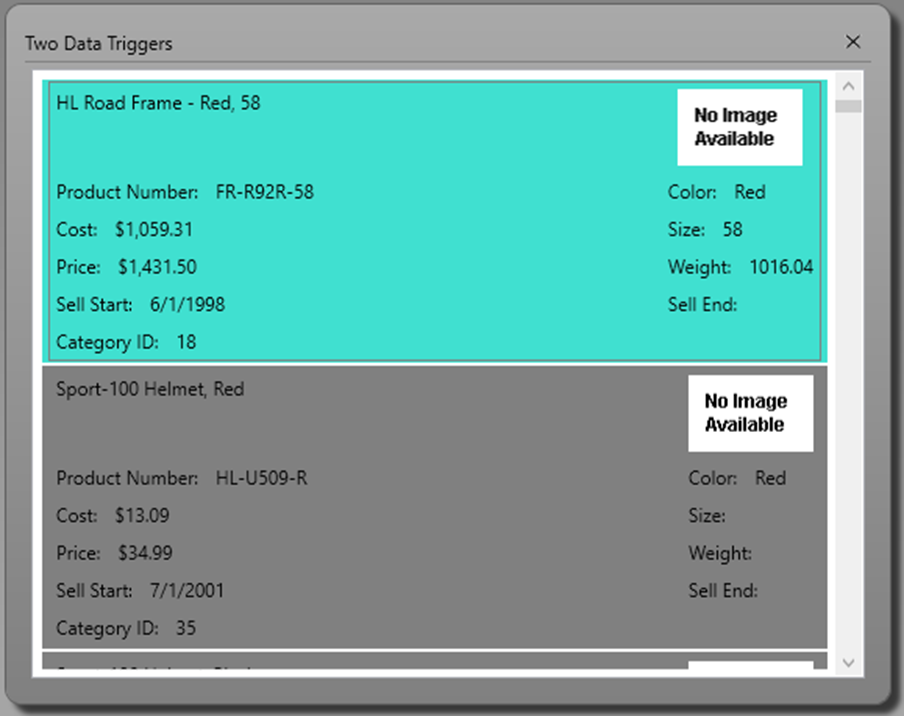
You are not limited to just a single data trigger; you may add as many triggers as you want. The more triggers you add, however, the slower your list box might display. In the code snippet below, you can see that an additional trigger has been added that checks for the ProductCategoryID to be the value "18". If that value occurs in the result set, then the background color of that row turns to the color turquoise as shown in Figure 2.
<Style TargetType="ListBoxItem">
  <Setter Property="HorizontalContentAlignment"
          Value="Stretch" />
  <Style.Triggers>
    <DataTrigger Binding="{Binding Path=SellEndDate}"
                  Value="{x:Null}">
      <Setter Property="Background"
              Value="Gray" />
    </DataTrigger>
    <DataTrigger Binding="{Binding Path=ProductCategoryID}"
                  Value="18">
      <Setter Property="Background"
              Value="Turquoise" />
    </DataTrigger>
  </Style.Triggers>
</Style>
Multiple Pieces of Data as a Trigger
Sometimes you may need to perform calculations on the data to figure out whether to apply a data trigger. For example, turn the background color to gray of those rows whose profit margin is greater than a certain value. To perform this calculation, you need three pieces of information; the cost of the product, the price of the product, and the profit margin to be greater than. In the Product class there are two properties StandardCost and ListPrice, but there is no property for ProfitMarginGreaterThan. Since you can't perform calculations in XAML, you need to create a class to calculate the profit.
If you have the source code to the Product class, you can add a new property and perform the calculation there. However, if you don't, create a multi-binding converter class. A multi-binding converter class named ProfitMarginGreaterThanConverter is shown in the listing below.
public class ProfitMarginGreaterThanConverter : IMultiValueConverter
{
  public object Convert(object[] values, Type targetType,
    object parameter, CultureInfo culture) {
    decimal ret = 0;
    decimal cost = 0;
    decimal price = 0;
    decimal margin = 50;

    if (values.Count() > 1) {
      // First parameter is cost
      cost = System.Convert.ToDecimal(values[0]);
      // Second parameter is price
      price = System.Convert.ToDecimal(values[1]);
      if (parameter != null) {
        // parameter is value to be greater than
        margin = System.Convert.ToDecimal(parameter);
      }
      // Calculate the profit margin
      ret = Math.Round(((price - cost) / cost), 1);
    }

    return (ret * 100) > margin;
  }

  public object[] ConvertBack(object value, Type[] targetTypes, object parameter, CultureInfo culture) {
    throw new NotImplementedException();
  }
}
The difference between a multi-binding converter and a normal converter class is this class implements the IMultiValueConverter interface. The Convert() method accepts an array of object values instead of just a single value that a normal converter class accepts.
Within the code, you read the values[] array to get the values passed in. These values are passed positionally, so you need good documentation on the usage of this class. This class reads the cost from the first array element, then the list price from the second element. The parameter argument is the value for the profit margin to be greater than. With these three pieces of information you can determine if the profit margin is greater than the value passed to this class and return a true or a false value.
To use this class, create an instance of this class in the <UserControl.Resources> section in your user control. Assign a unique Key value to this instance as shown in the code below.
<UserControl.Resources>
  <local:ProfitMarginGreaterThanConverter
    x:Key="profitMarginGTConverter" />
</UserControl.Resources>
Defining a multi-binding data trigger is different from a single value data trigger as you can see in the following XAML code.
<Style TargetType="ListBoxItem">
  <Setter Property="HorizontalContentAlignment"
          Value="Stretch" />
  <Style.Triggers>
    <DataTrigger Value="True">
      <DataTrigger.Binding>
        <MultiBinding
          Converter="{StaticResource profitMarginGTConverter}"
                      ConverterParameter="60">
          <Binding Path="StandardCost" />
          <Binding Path="ListPrice" />
        </MultiBinding>
      </DataTrigger.Binding>
      <Setter Property="Background"
              Value="Gray" />
    </DataTrigger>
  </Style.Triggers>
</Style>
In the <DataTrigger> element you set the attribute Value to the value you expect to be returned from the multi-binding converter class. In this case a "True" value is supposed to be returned for this trigger to be applied. Use the <DataTrigger.Binding> element to specify you are going to be using a <MultiBinding>. Within the <MultiBinding> element, set the attribute Converter to the static resource you previously created. Set the ConverterParameter equal to the value you wish the profit margin to be greater than. In this case, that value is "60".
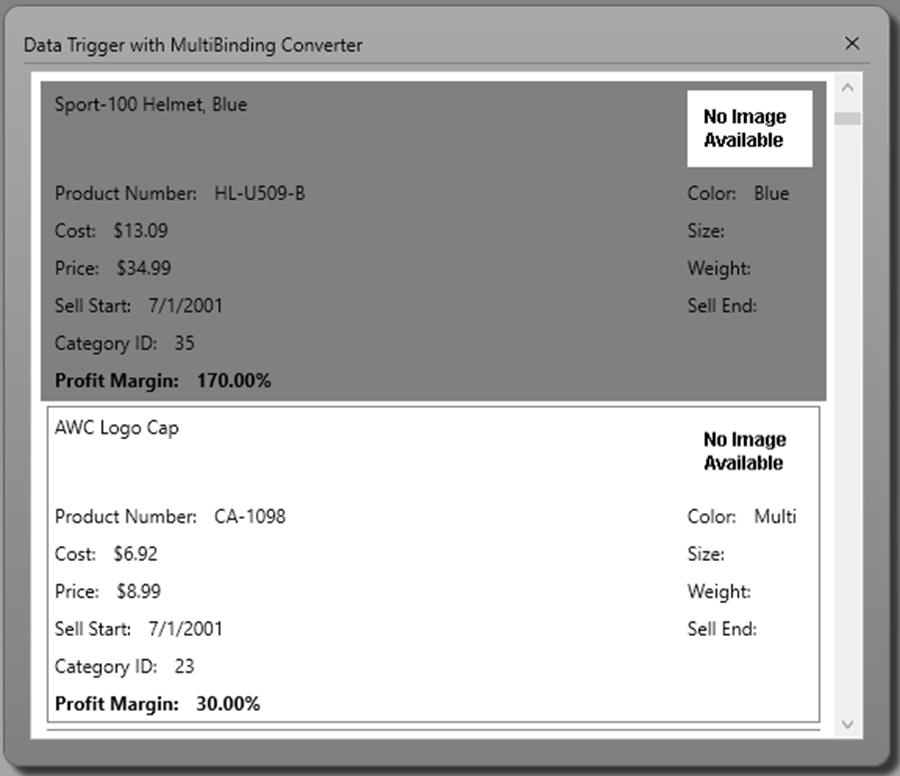
Next, you use as many <Binding> elements as you need. The Path attribute of each of these is set to the property to read in the data source. Each of these values is passed to the values[] array in the converter class. If the value returned from the converter class matches the "True" value specified, then the background color of the row is turned to a Gray color as shown in Figure 3.
Summary
In this blog post you learned to use a data trigger to modify the look and feel of certain rows based on data from your Product class. You may create one or more data triggers and each one can modify the look of each row differently. A multi-binding converter class is used if you need to perform calculations on multiple pieces of data and use the value returned to modify the look of each row.
#wpf #listbox #pauldsheriff #development #programming