Create CRUD Web API in .NET Core
In this blog post you learn to create a .NET Core web server to service Web API calls coming from any Ajax front-end. As more mobile applications are being demanded by consumers, chances are you are going to have to provide a way for consumers to get at data within your organization. A consumer of your data may be a programmer of a mobile application, a desktop application, or even an HTML page being served from a web server. You do not just want to expose an entire database of your data to all consumers. Instead, create an Application Programming Interface (API) in which you decide how and what to expose to these consumers. A Web API, also called a REST API is a standard mechanism these days to expose your data to consumers outside your organization.
Tools You Need
It is suggested you follow along step-by-step with this blog post to build a .NET Web API project to run C# code to retrieve data from a SQL Server table. For this blog post I am going to use the following technologies.
- Visual Studio Code v1.8x.x or higher
- .NET v6.x or higher
- Entity Framework
- SQL Server 2019 Developer Edition or higher
- SQL Server AdventureWorksLT Sample Database
If you wish to follow along, download these tools, and install on your computer. At the time of the writing of this blog post, these tools can be retrieved from the following locations.
- VS Code - code.visualstudio.com
- .NET Core - dotnet.microsoft.com/download
- SQL Server - www.microsoft.com/en-us/sql-server/sql-server-downloads
- AdventureWorksLT Sample Database - https://github.com/PaulDSheriff/AdventureWorksLT
Create a Web API Server
Create a .NET Web API project to retrieve the data from the SQL Server AdventureWorksLT database and send it back to the web page. Open an instance of VS Code and open a terminal window. Navigate to your normal development folder. Create a .NET Web API app using the following dotnet command.
dotnet new webapi -n WebAPI
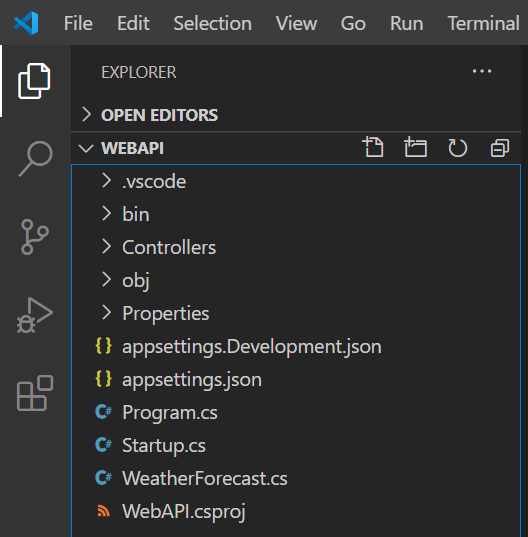
Once the dotnet command finishes, select File | Open Folder… from the menu and select the WebAPI folder you created. Your VS Code will look like that shown in Figure 1.
Add Required Assets
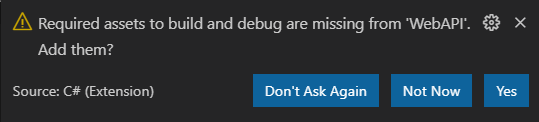
At the bottom right-hand corner of VS Code, a dialog appears (Figure 2) asking you to add some required assets. Click the Yes button to allow VS Code to load the various packages to support C# and Web API programming. If for some reason you do not see this dialog, exit VS Code and restart it.
Try it Out
Select Run | Start Debugging from the menu to build the .NET Web API project and launch a browser. If a dialog box appears asking if you should trust the IIS Express certificate, answer Yes. In the next Security Warning dialog that appears next, also answer Yes. Once the browser appears, it comes up with a 404 error page. Type in the following address into the browser address bar.
https://localhost:5001/weatherforecast
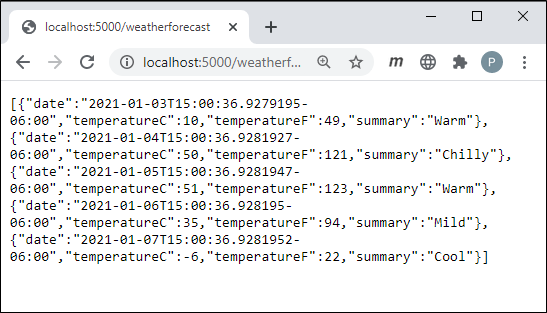
If you get an error related to privacy and/or HTTPS. Open the \Properties\launchSettings.json file and modify the "applicationURL" property to use http://localhost:5000. After hitting enter you should see a string that looks like Figure 3. This means that your Web API server is working and you are ready to create your own controller to retrieve product data from a SQL Server database.
Build Database Access Classes
This blog post uses the AdventureWorksLT sample database that comes with SQL Server. You can download a .bak file for this SQL database at https://github.com/PaulDSheriff/AdventureWorksLT. In this github repository there is also a .sql file you can use to build the SQL database if the backup file does not work with your version of SQL Server.
Add Entity Framework
I am going to use the Entity Framework to interact with the AdventureWorksLT database. To use the Entity Framework in the .NET application, you need to add a package to your project. From the VS Code menu select Terminal | New Terminal. Ensure the terminal prompt is in your WebAPI project folder and type in the following command.
dotnet add package Microsoft.EntityFrameworkCore.SqlServer
Build an Entity Class
Create a Product class in C# to match the fields in the SalesLT.Product table. You are going to use some data annotations for use with the Entity Framework as well. Right mouse-click on the WebAPI folder and add a new folder named EntityClasses. Right mouse-click on the \EntityClasses folder and add a new file named Product.cs. Into this new file add the code shown in Listing 1.
using System;
using System.ComponentModel.DataAnnotations;
using System.ComponentModel.DataAnnotations.Schema;

namespace WebAPI
{
  [Table("Product", Schema ="SalesLT")]
  public partial class Product
  {
    [Required]
    [Key]
    [DatabaseGenerated(DatabaseGeneratedOption.Identity)]
    public int ProductID { get; set; }
    [Required(ErrorMessage = "The Product Name is required")]
    public string Name { get; set; }
    [Required]
    public string ProductNumber { get; set; }
    public string Color { get; set; }
    [Required]
    public decimal StandardCost { get; set; }
    [Required]
    public decimal ListPrice { get; set; }
    public string Size { get; set; }
    public decimal? Weight { get; set; }
    public int? ProductCategoryID { get; set; }
    public int? ProductModelID { get; set; }
    [Required]
    public DateTime SellStartDate { get; set; }
    public DateTime? SellEndDate { get; set; }
    public DateTime? DiscontinuedDate { get; set; }
    [Required]
    public Guid rowguid { get; set; }
    [Required]
    public DateTime ModifiedDate { get; set; }
  }
}
Add a AdventureWorksLTDbContext.cs file
To retrieve and modify data in the SalesLT.Product table through the Product class you need an instance of a DbContext class. Create a folder named \Models in your WebAPI project. Right mouse-click on this folder and create a file named AdventureWorksLTDbContext.cs in the \Models folder. Add the code shown in Listing 2 to this file.
using Microsoft.EntityFrameworkCore;

namespace WebAPI {
  public partial class AdventureWorksLTDbContext : DbContext {
    public AdventureWorksLTDbContext(
      DbContextOptions<AdventureWorksLTDbContext> options)
        : base(options) {
    }

    public virtual DbSet<Product> Products { get; set; }

    protected override void OnModelCreating(
      ModelBuilder modelBuilder) {
      base.OnModelCreating(modelBuilder);
    }
  }
}
Modify appSettings.json
You need a connection string for the DbContext object to work. It is a best practice to place your connection strings in the appSettings.json file. Open the appSettings.json file and add a new property named ConnectionStrings. Set the value of this new JSON object to the code shown below. Note that I had to break the connection string across multiple lines to format it for the printed page. When you type in your connection string, ensure it all is on a single line.
{
  "ConnectionStrings": {
    "DefaultConnection": "Server=Localhost;
       Database=AdventureWorksLT;
       Trusted_Connection=True;
       MultipleActiveResultSets=true"
  },
  ...
}
Configure Web API
When using a .NET Web API a lot of "magic" happens with Dependency Injection and setting configuration options. Add some packages and configuration code to help make this magic happen.
Add System.Text.Json
You are going to be sending and receiving JSON from your Ajax calls. The recommended package to use these days is the one contained in the System.Text.Json package. Add this package to your WebAPI project by executing the following command in the terminal window of VS Code.
dotnet add package System.Text.Json
Add CORS
The JavaScript code you wrote in your node or .NET web server is running on localhost:3000, however, the Web API code is running on localhost:5000. These are two completely different domains. For your JavaScript or other client-side application to call this Web API you must tell the Web API that you are allowing Cross-Origin Resource Sharing (CORS). To use CORS, you need to add this package into your project. Go back to the terminal window and type in the following command.
dotnet add package Microsoft.AspNetCore.Cors
Modify Startup.cs
Now that you have added two new packages, let's use them. Open the Startup.cs file and add two using statements at the top of the file.
using Microsoft.EntityFrameworkCore;
using System.Text.Json;
Locate the ConfigureServices() method and add the code shown in bold in Listing 3. This code informs this project that you want to allow CORS to be used. It also sets the JSON converter to automatically convert and property names that are in camel case to pascal case and vice versa. The next lines inject an instance of the AdventureWorksLTDbContext class you created earlier and passes in an options object that is loaded with the connection string you stored in the appSettings.json file.
public void ConfigureServices(IServiceCollection services) {
// Tell this project to allow CORS
  services.AddCors();

  // Convert JSON from Camel Case to Pascal Case
  services.AddControllers().AddJsonOptions(options => {
    // Use the default property (Pascal) casing.
    options.JsonSerializerOptions.PropertyNamingPolicy =
      JsonNamingPolicy.CamelCase;
  });

  // Setup the AdventureWorks DB Context
  // Read in the connection string from the appSettings.json file
  services.AddDbContext<AdventureWorksLTDbContext>(options =>
            options.UseSqlServer(
    Configuration.GetConnectionString("DefaultConnection")));

  services.AddControllers();
  services.AddSwaggerGen(c => {
    c.SwaggerDoc("v1", new OpenApiInfo {
                         Title = "WebAPI",
                         Version = "v1" });
  });
}
Locate the Configure() method and add the lines of code shown in bold below. This code configures CORS with a list of URLs this Web API project allows to make calls. The other two chained methods, AllowAnyMethod() and AllowAnyHeader(), allow all verbs (GET, POST, PUT, etc), and any HTTP headers.
public void Configure(IApplicationBuilder app,
                      IWebHostEnvironment env) {
  ...

app.UseCors(options =>
       options.WithOrigins("http://localhost:3000")
      .AllowAnyMethod().AllowAnyHeader()
  );

  app.UseEndpoints(endpoints => {
    endpoints.MapControllers();
  });
}
Create a Base Controller
You are most likely going to be building several controllers, so it is best to create a base class that all your controllers can inherit from. Microsoft supplies the ControllerBase class that all controllers should inherit from. Create your own class like the one shown in Listing 4 that inherits from ControllerBase. Then make all your classes inherit from this BaseApiController class.
Adding your own base controller class allows you to add code that all controllers can use. For example, you might want a single method to handle any exceptions. In the HandleException() method you could publish any exceptions, then return a specified status code such as a 500 that can be communicated back to the calling application. Right mouse-click on the Controllers folder and add a new file named BaseApiController.cs. Add the code shown in Listing 4 to this new file.
using System;
using Microsoft.AspNetCore.Mvc;
using Microsoft.AspNetCore.Http;

namespace WebAPI.Controllers {
  public class BaseApiController : ControllerBase {
    protected IActionResult HandleException(Exception ex,
      string msg) {
      IActionResult ret;

      // TODO: Publish exceptions here

      // Create new exception with generic message
      ret = StatusCode(StatusCodes.Status500InternalServerError,
              new Exception(msg));

      return ret;
    }
  }
}
Delete Weather Classes
You are not going to need the WeatherForecast classes anymore, so feel free to delete the \Controllers\WeatherForecastController.cs and the \WeatherForecast.cs files from the project.
Create Product Controller
Now that you have a Product and DbContext classes to allow data access to the SQL Server database, it is time to build a controller class to use those classes to get the data and send it back to the calling application.
Right mouse-click on the Controllers folder and add a new file named ProductController.cs. Dependency Injection (DI) is used to insert the AdventureWorksLTDbContext object into the constructor of this controller (Listing 5). Remember that an instance of this class was created in the Startup.ConfigureServices() method. When a class is detected in the constructor of a controller class, .NET looks up the class name in its DI list to see if there is an object that has been registered. If so, it retrieves the instance and injects it into the constructor. This object is assigned to the field _DbContext for use within any method in this controller class.
using System;
using System.Collections.Generic;
using System.Linq;
using Microsoft.AspNetCore.Http;
using Microsoft.AspNetCore.Mvc;

namespace WebAPI.Controllers {
  [Route("api/[controller]")]
  [ApiController]
  public class ProductController :
    BaseApiController {
public ProductController(
      AdventureWorksLTDbContext context)
      : base() {
      _DbContext = context;
    }

    private AdventureWorksLTDbContext _DbContext;
  }
}
Get all Products
Add a Get() method to the new controller (Listing 6) and use EF to detect if there are any products in the Products collection on the DbContext object. If there are not, then an ObjectResult object is created by calling StatusCode(StatusCodes.Status404NotFound, "message"). This method sets the HTTP status code of 404 and returns a message for the calling application to read. The HTTP status code (404) is placed into the status property of the XMLHttpRequest object and the message is placed into the responseText property.
If there are products in the Products collection, then a call to StatusCode(StatusCodes.Status200OK, list) is made to create an ObjectResult filled with the status code of 200 and the list of products to return.
If an error occurs when attempting to retrieve products from the database, then a call to the HandleException() method in the base class is made. In this method a status code of 500 is created and the response is the exception information.
private const string ENTITY_NAME = "product";

// GET api/values
 [HttpGet]
public IActionResult Get() {
  IActionResult ret = null;
  List<Product> list = new List<Product>();

  try {
    if (_DbContext.Products.Count() > 0) {
      list = _DbContext.Products.OrderBy(p => p.Name).ToList();
      ret = StatusCode(StatusCodes.Status200OK, list);
    } else {
      ret = StatusCode(StatusCodes.Status404NotFound,
        "No " + ENTITY_NAME + "s exist in the system.");
    }
  } catch (Exception ex) {
    ret = HandleException(ex,
       "Exception trying to get all " + ENTITY_NAME + "s.");
  }

  return ret;
}
Try it Out
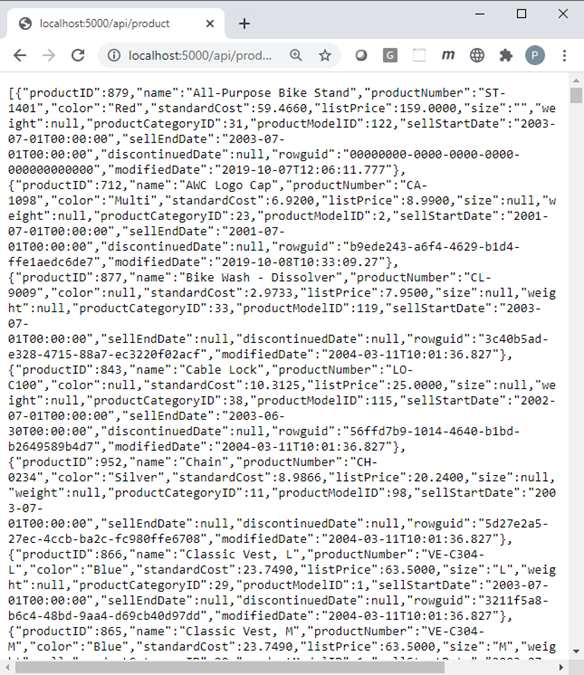
Run the Web API project by selecting Run | Start Debugging from the menu. Once the browser comes up, type in http://localhost:5000/api/product and you should see data appear like that shown in Figure 4.
Get a Single Product
Besides retrieving all products, you might also need to just retrieve a single product. This requires you to send a unique identifier to a Web API method. For the Product table this is value in the ProductID field.
Go back to the Web API project and open the ProductController.cs file. Add a new method that looks like Listing 7. This method is very similar to the Get() method you created earlier, however, just a single product is returned if found.
[HttpGet("{id}")]
public IActionResult Get(int id) {
  IActionResult ret = null;
  Product entity = null;

  try {
    // Declare 'entity' outside the using to avoid it
    // being disposed before it is returned.
    entity = _DbContext.Products.Find(id);
    if (entity != null) {
      ret = StatusCode(StatusCodes.Status200OK, entity);
    } else {
      ret = StatusCode(StatusCodes.Status404NotFound,
                "Can't find " + ENTITY_NAME + ": " +
                id.ToString() + ".");
    }
  } catch (Exception ex) {
    ret = HandleException(ex,
      "Exception trying to retrieve " + ENTITY_NAME + " ID: "
           + id.ToString() + ".");
  }

  return ret;
}
Try it Out
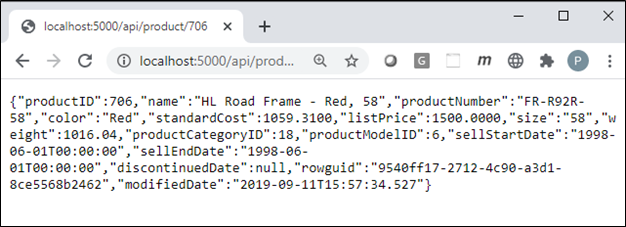
Save the changes to your ProductController and restart the Web API project so it can pick up the changes you made. When the browser comes up, type in the following: http://localhost:5000/api/product/706. This passes the value 706 to the Get(int id) method. You should see a screen similar to Figure 5
Insert a Product
If you wish to send a new product to your web server and have it inserted into the Product table, you need to create a Web API method to allow a JSON product object to be passed in. Create a new method in your ProductController class call Post() as shown in Listing 8.
The .NET Web API automatically takes a JSON object that has the same properties as the C# Product class you created earlier and maps it to the entity argument to this method. An example of a JSON object that could be passed might look like the following:
{
  "productID": 0,
  "name": "A New Product",
  "productNumber": "NEW-999",
  "color": "Red",
  "standardCost": 20,
  "listPrice": 40,
  "sellStartDate": "2021-01-15"
}
As you can see from the JSON object above not all fields are present compared to the C# Product class. That is why in the Post() method you need to fill in a few other fields with some default values. I am doing this just to keep things simple for passing in a JSON object. In a real application, you would most likely be passing in all fields for your entity class.
[HttpPost()]
public IActionResult Post(Product entity) {
  IActionResult ret = null;

  try {
    if (entity != null) {
      // Fill in required fields not used by client
      entity.ProductCategoryID = 18;
      entity.ProductModelID = 6;
      entity.rowguid = Guid.NewGuid();
      entity.ModifiedDate = DateTime.Now;

      _DbContext.Products.Add(entity);
      _DbContext.SaveChanges();

      ret = StatusCode(StatusCodes.Status201Created, entity);
    } else {
      ret = StatusCode(StatusCodes.Status400BadRequest,
                "Invalid " + ENTITY_NAME +
                " object passed to POST method.");
    }
  } catch (Exception ex) {
    ret = HandleException(ex,
          "Exception trying to insert a new " + ENTITY_NAME + ".");
  }

  return ret;
}
Update Product Data
If you wish to update a product that already exists in the AdventureWorksLT Product table, you need to create a Put() method in your Web API project as shown in Listing 9. You pass to this Put() method the unique id of the product you wish to update and the data to update. For the sample in this blog post, we are not asking the user for all of product data. There are more fields in the Product table than we have on the web page. Thus you need to Find() the product in the Product table and retrieve all of the data and then only update those fields that we pass in from the front-end. Most likely you won't be doing this in your applications, I am just trying to keep the sample as small as possible.
[HttpPut("{id}")]
public IActionResult Put(int id, Product entity) {
  IActionResult ret = null;

  try {
    if (entity != null) {
      // Since we don't send all the data down,
      // read in existing entity, and overwrite changed properties
      Product changed = _DbContext.Products.Find(id);
      if (changed != null) {
        changed.Name = entity.Name;
        changed.ProductNumber = entity.ProductNumber;
        changed.Color = entity.Color;
        changed.StandardCost = entity.StandardCost;
        changed.ListPrice = entity.ListPrice;
        changed.Size = entity.Size;
        changed.Weight = entity.Weight;
        changed.SellStartDate = entity.SellStartDate;
        changed.SellEndDate = entity.SellStartDate;
        changed.ModifiedDate = DateTime.Now;

        _DbContext.Update(changed);
        _DbContext.SaveChanges();
        ret = StatusCode(StatusCodes.Status200OK, changed);
      } else {
        ret = StatusCode(StatusCodes.Status404NotFound,
         "Can't find ProductID=" + id.ToString());
      }
    } else {
      ret = StatusCode(StatusCodes.Status400BadRequest,
              "Invalid " + ENTITY_NAME +
              " object passed to PUT method.");
    }
  } catch (Exception ex) {
    ret = HandleException(ex,
          "Exception trying to update " + ENTITY_NAME + " ID: "
              + entity.ProductID.ToString() + ".");
  }

  return ret;
}
Delete Product Data
Now that you have inserted and updated product data, let's learn to delete a product from the table. Create a new Web API method as shown in Error! Reference source not found.. Pass in the unique id for the product you wish to delete. Locate the product using the Find() method and if the record is found, call the Remove() method on the Products collection in the DbContext and SaveChanges() on the DbContext.
[HttpDelete("{id}")]
public IActionResult Delete(int id) {
  IActionResult ret = null;
  Product entity = null;

  try {
    entity = _DbContext.Products.Find(id);
    if (entity != null) {
      _DbContext.Products.Remove(entity);
      _DbContext.SaveChanges();
      ret = StatusCode(StatusCodes.Status200OK, true);
    } else {
      ret = StatusCode(StatusCodes.Status404NotFound,
             "Can't find " + ENTITY_NAME + " ID: " + id.ToString()
             + " to delete.");
    }
  } catch (Exception ex) {
    ret = HandleException(ex,
    "Exception trying to delete " + ENTITY_NAME + "ID: "
      + id.ToString() + ".");
  }

  return ret;
}
Summary
In this blog post you built a .NET Core Web API project to retrieve data from a SQL Server database table, serialize that data as JSON, and return it to your web page. The ProductController handles all CRUD logic for the Product table in the AdventureWorkLT database. This is a fairly standard controller used to retrieve, add, edit and delete records in a table. One additional method you might add on would be method to search for records based on one or more fields in the table.
#dotnet #dotnetcore #webapi #mvc #ajax #pauldsheriff #development #programming