Interacting with HTML Forms using jQuery
In this blog post you are going to explore using jQuery functions to help you with input forms and user input.
Asynchronous JavaScript And XML (Ajax) is the cornerstone of communication between your client-side and server-side code. Regardless of whether you use JavaScript, jQuery, Angular, React or any other client-side language, they all use Ajax under the hood to send and receive data from a web server. Using Ajax you can read data from, or send data to, a web server all without reloading the current web page. In other words, you can manipulate the DOM and the data for the web page without having to perform a post-back to the web server that hosts the web page. Ajax gives you a huge speed benefit because there is less data going back and forth across the internet. Once you learn how to interact with Ajax, you will find the concepts apply to whatever front-end language you use.
Download Starting Projects
Instead of creating a front-end web server and a .NET Core Web API server in this blog post I have two sample projects you may download to get started quickly. If you are unfamiliar with building a front-end web server and a .NET Core Web API server, you can build them from scratch step-by-step in my three blog posts listed below.
- Create CRUD Web API in .NET Core
- Create .NET Core MVC Application for Ajax Communication
- Create Node Web Server for Ajax Communication
You can find all three of these blog posts at https://www.pdsa.com/blog. Instructions for getting the samples that you can start with are contained in each blog post. You are going to need blog post #1, then choose the appropriate web server you wish to use for serving web pages; either .NET MVC (#2) or NodeJS (#3).
Start Both Projects
After you have reviewed the blog posts and downloaded the appropriate sample projects to your hard drive, start both projects running. The first project to load is the Web API project. Open the WebAPI folder in VS Code and click on the Run | Start Debugging menus to load and run the .NET Web API project.
Open the AjaxSample folder in VS Code.
If you are using node, open the AjaxSample folder in VS Code, open a Terminal window and type npm install. Then type npm run dev to start the web server running and to have it display the index page in your browser.
If you are using the .NET MVC application, open the AjaxSample-NET folder in VS Code and click on the Run | Start Debugging menus to load and run the .NET MVC project. The index.cshtml page should now be displayed in your browser window.
Try it Out
Go to your browser for the front-end web server (localhost:3000) and you should see a page that looks like Figure 1. If your browser looks like this, everything is working for your front-end web server.
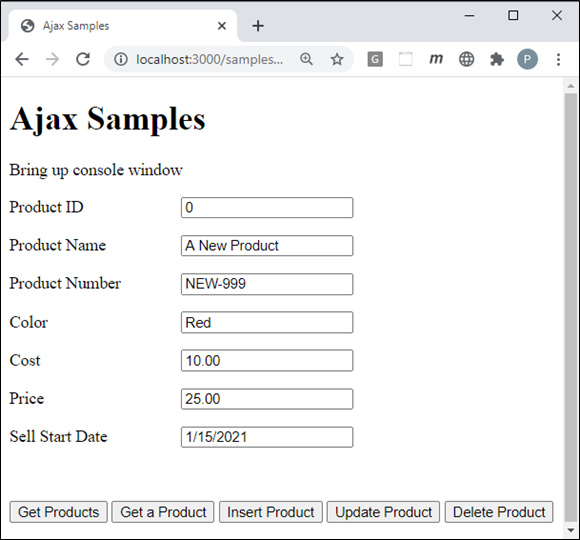
Open the Browser Tools in your browser, usually accomplished by clicking the F12 key. Click the Get Products button and you should see the product data retrieved from the Product table in the AdventureWorksLT database and displayed in your console window.
Install jQuery
If you have not already done so, you need to install jQuery into your node server project. If you are using the MVC application, jQuery is already installed, so you can skip to the next section of this blog post. Open the Terminal window in VS Code in your node server project and type the following command.
npm install jquery
After jQuery has been installed, open you index page and add a new <script> tag to use jQuery before all other <script> tags on the page.
<script src="/node_modules/jquery/dist/jquery.min.js"></script>
Use Form Events to Display Messages
HTML supports attributes named "data-" (pronounced data dash) where you can add anything you want after the dash. HTML ignores these attributes when drawing the page. Instead, these data- attributes are for you to use however you want.
Add data-onfocus to Input Fields
One thing you might want to use these for is to display a message to the user when they click into each input field. Open the index page and add a data-onfocus attribute with a message to display after it as shown in the code in bold in Listing 1.
  <form>
    <div class="row">
      <label for="productID">Product ID</label>
      <input id="productID" name="productID" type="text" data-onfocus="Enter a Product ID" value="0" />
    </div>
    <div class="row">
      <label for="name">Product Name</label>
      <input id="name" name="name" type="text" data-onfocus="Enter a Product Name" value="A New Product" />
    </div>
    <div class="row">
      <label for="productNumber">Product Number</label>
      <input id="productNumber" name="productNumber" type="text" data-onfocus="Enter a Product Number"
        value="NEW-999" />
    </div>
    <div class="row">
      <label for="color">Color</label>
      <input id="color" name="color" type="text" data-onfocus="Enter a Color" value="Red" />
    </div>
    <div class="row">
      <label for="standardCost">Cost</label>
      <input id="standardCost" name="standardCost" type="number" data-onfocus="Enter the Product Cost"
        value="10.00" />
    </div>
    <div class="row">
      <label for="listPrice">Price</label>
      <input id="listPrice" name="listPrice" type="number" data-onfocus="Enter the Product Price" value="25.00" />
    </div>
    <div class="row">
      <label for="sellStartDate">Sell Start Date</label>
      <input id="sellStartDate" name="sellStartDate" type="text"
        data-onfocus="Enter the date the Product can start selling" value="1/15/2021" />
    </div>
    <div class="row">
      <label id="message" class="infoMessage"></label>
      <label id="error" class="errorMessage"></label>
    </div>
    <div class="row">
      <button type="button" onclick="get();">
        Get Products
      </button>
      <button type="button" onclick="getProduct();">
        Get a Product
      </button>
      <button type="button" onclick="insertProduct();">
        Insert Product
      </button>
      <button type="button" onclick="updateProduct();">
        Update Product
      </button>
      <button type="button" onclick="deleteProduct();">
        Delete Product
      </button>
    </div>
  </form>
Hook up the 'focus' and 'blur' Events
Within the <script> tags in the index page, add some code within the $(document).ready() function to hook up all input fields on this page to the 'focus' and 'blur' events as shown in Listing 2. The jQuery .on() method is used to connect selected object to events such as onfocus and onblur. jQuery shortens these to simply 'focus' and 'blur'.
In the code that connects to the 'focus' event, grab the data from the data-onfocus attribute and assign that into a variable called msg. Fill in the text of the <label> with the id of 'message' with the data retrieved from the data-onfocus attribute. When the user clicks into an input field on the page the message associated with that input field is displayed in the message area.
When the user leaves an input field, the onblur event is fired. Within this event, set the text for the <label> with the id of 'message' to an empty string. Add the code shown in Listing 2 to the index page.
  $(document).ready(function () {
    // Display message using form event 'focus'
    $("input").on('focus', function () {
      let msg = $(this).data("onfocus");
      displayMessage(msg);
    });

    // Clear message using form event 'blur'
    $("input").on('blur', function () {
      displayMessage("");
    });
  });
Try it Out
Save the changes you made to the index page and go to the browser and click on any input field on the page. You should see the data-onfocus message appear for that input field appear on the page. Try clicking into various input fields to watch the message change.
Use the jQuery .submit() Method
Up to this point, you have called specific functions from the insert and update buttons. However, as we all know, there are always multiple ways to accomplish the same task in programming. jQuery supplies a .submit() method that you can apply to a form tag selector. If you have submit buttons inside your <form> tag, the .submit() method callback event is fired. Modify the buttons in your form to look like the code below.
  <div class="row">
    <button type="button" onclick="get();">Get Products</button>
    <button type="button" onclick="getProduct();">
      Get a Product
    </button>

    <button data-type="post">Insert Product</button>
    <button data-type="put">Update Product</button>

    ...
  </div>
You are going to use the data-type attributes to identify which button was pressed when in the .submit() event function. In the <script> tag write the code shown below to respond to the .submit() event. Prevent the form from submitting by calling the preventDefault() method on the event argument. Next, you need to figure out if you are going to call the insertProduct() or updateProduct() function. You do this by retrieving the data-type attribute from the current activeElement on the document. If the value of the data-type attribute is equal to "post" you know the Insert Product button was clicked, and thus you call the insertProduct() function, otherwise, call the updateProduct() function.
  $(document).ready(function () {

    ...

    // Respond to submit form
    $("form").submit(function (event) {
      event.preventDefault();

      if ($(document.activeElement).data("type") == "post") {
        insertProduct();
      } else {
        updateProduct();
      }
    });
  });
Insert a Product
Modify the insertProduct() function to look like Listing 4.
function insertProduct() {
  // Build product object from user input
  let product = getFromInput();

  $.ajax({
    url: URL,
    type: "POST",
    contentType: "application/json",
    data: JSON.stringify(product)
  })
    .done(function (data) {
      displayMessage("Product Inserted");
      console.log(data);
      setInput(data);
    })
    .fail(function (error) {
      handleAjaxError(error);
    })
    .always(function () {
      // Anything you want to happen here on either fail or done
    });
}
Update a Product
Modify the updateProduct() function as shown in Listing 5.
function updateProduct() {
  // Build product object from user input
  let product = getFromInput();

  $.ajax({
    url: URL + "/" + product.productID,
    type: "PUT",
    contentType: "application/json",
    data: JSON.stringify(product)
  })
    .done(function (data) {
      displayMessage("Product Inserted");
      console.log(data);
      setInput(data);
    })
    .fail(function (error) {
      handleAjaxError(error);
    })
    .always(function () {
      // Anything you want to happen here on either fail or done
    });
}
Listing 5: Update data using the PUT verb and passing the product id on the URL.
Delete a Product
Modify the deleteProduct() function on the index page to look like Listing 6.
function deleteProduct() {
  $.ajax({
    url: URL + "/" + getValue("productID"),
    type: "DELETE"
  })
    .done(function (data) {
      displayMessage("Product Deleted");
      console.log(data);
      clearInput();
    })
    .fail(function (error) {
      handleAjaxError(error);
    })
    .always(function () {
      // Anything you want to happen here on either fail or done
    });
}
Try it Out
Save all your changes and go back to the browser. Try clicking on the Insert Product and the Update Product buttons to check if you typed in the code correctly. If you do get an error, either change the Product Name and Product Number to something unique or go into the SalesLT.Product table and delete the record that was inserted with the ProductNumber field equal to "NEW-999".
After you have tested the insert and update functionality, click the Delete Product button to delete the product record.
jQuery .serializeArray() Method
jQuery has a method called .serializeArray which takes all of the inputs within a <form> and creates an array of objects. For each input, there is an object that has the name of the input field and the value of the input: { name: 'name attribute', value: 'value of input' }. Once you have this array of objects, you can pass them to a Web API method that accepts an array of these objects.
To start this process, go to your Web API project and add a new file in the EntityClasses folder named NameValuePair.cs. Add the code shown below into this new file. This C# class matches each JSON object created by the .serializeArray() method.
namespace WebAPI {
  public class NameValuePair {
    public string Name { get; set; }
    public string Value { get; set; }
  }
}
Next, open the ProductController.cs file and create another Post() method (Listing 7) but add a Route() attribute to give it a unique route. The argument coming in to this method is a List<NameValuePair> because the data sent from the .serializeArray() can map an array of the literal JSON objects to this kind of structure automatically. The only thing you need to do is to convert the List<NameValuePair> objects to a Product object that the Entity Framework can use. Listing 8 shows the BuildProductObject() method that takes the list of NameValuePair objects and performs this conversion.
[HttpPost()]
[Route("ProductNameValue")]
public IActionResult Post(List<NameValuePair> list) {
  IActionResult ret = null;
  Product entity;

  // Get all values passed in the array of name/value pairs
  entity = BuildProductObject(list);
  entity.ProductID = 0;

  try {
    // Fill in required fields not used by client
    entity.ProductCategoryID = 18;
    entity.ProductModelID = 6;
    entity.rowguid = Guid.NewGuid();
    entity.ModifiedDate = DateTime.Now;

    if (entity != null) {
      _DbContext.Products.Add(entity);
      _DbContext.SaveChanges();
      ret = StatusCode(StatusCodes.Status201Created,
          entity);
    } else {
      ret = StatusCode(StatusCodes.Status400BadRequest,
                "Invalid " + ENTITY_NAME + " object passed to POST method.");
    }
  } catch (Exception ex) {
    ret = HandleException(ex,
              "Exception trying to insert a new " + ENTITY_NAME + ".");
  }

  return ret;
}
Within the ProductController.cs file, create a new method named BuildProductObject() to take the list of NameValuePair objects and convert to a Product object. Listing 8 shows the code to accomplish this.
private Product BuildProductObject(List<NameValuePair> values) {
  Product entity = new Product();

  // Get all values passed in the Form property
  entity.ProductID = Convert.ToInt32(values.Find(n => n.Name == "productID").Value);
  entity.Name = values.Find(n => n.Name == "name").Value;
  entity.ProductNumber = values.Find(n => n.Name == "productNumber").Value;
  entity.Color = values.Find(n => n.Name == "color").Value;
  entity.StandardCost = Convert.ToDecimal(values.Find(n => n.Name == "standardCost").Value);
  entity.ListPrice = Convert.ToDecimal(values.Find(n => n.Name == "listPrice").Value);
  entity.SellStartDate = Convert.ToDateTime(values.Find(n => n.Name == "sellStartDate").Value);

  return entity;
}
Go back to your HTML project and add a new function (Listing 9) named insertProductUsingArray(). In this function you first create a new variable named url. Build this variable from the URL constant and adding on the value you placed into the Route() attribute. Build the array of JSON objects by performing a jQuery selector on the <form> element and applying the .serializeArray() method on that object. The code after that is the normal Ajax code you have been writing throughout this blog post series.
function insertProductUsingArray() {
  let url = URL + "/ProductNameValue";

  // Create an array of all input values in the form
  // Array is in the format
  //  { name: 'name attribute', value: 'value of input' }
  let product = $("form").serializeArray();

  $.post({
    url: url,
    contentType: "application/json",
    data: JSON.stringify(product)
  })
    .done(function (data) {
      displayMessage("Product Inserted using serializeArray()");
      console.log(data);
      setInput(data);
    })
    .fail(function (error) {
      handleAjaxError(error);
    })
    .always(function () {
      // Anything you want to happen here on either fail or done
    });
}
To try out this new function, add a new button just below the other buttons on this form.
<button type="button" onclick="insertProductUsingArray();">
  Insert using Array
</button>
Try it Out
Save all the changes you made to both the Web API project and the HTML project. Restart the Web API project so the compiler can rebuild the ProductController with the new method. Go back to the browser and click on the Insert using Array button.
jQuery .serialize() Method
Another method jQuery provides is called .serialize() and is used to create a url-encoded key/value pair. The result looks like &nameAttribute=value&nameAttribute=value... etc. Create the key/value pair by performing a jQuery selector on the <form> element and applying the .serialize() method on that object.
When using .NET Core you can accept a url-encoded string and automatically have it map it to a C# class on a Post method. The trick is to add the [FromQuery] attribute in front of the argument passed to the Post method. Listing 10 is what you should add to the ProductController.cs file in your Web API project. Provide a Route() attribute with a different route so you can uniquely call this Post method from the client-side code.
[HttpPost()]
[Route("ProductQuery")]
public IActionResult PostFromQuery([FromQuery] Product entity) {
  IActionResult ret = null;

  try {
    if (entity != null) {
      // Fill in required fields not used by client
      entity.ProductCategoryID = 18;
      entity.ProductModelID = 6;
      entity.rowguid = Guid.NewGuid();
      entity.ModifiedDate = DateTime.Now;

      _DbContext.Products.Add(entity);
      _DbContext.SaveChanges();
      ret = StatusCode(StatusCodes.Status201Created, entity);
    } else {
      ret = StatusCode(StatusCodes.Status400BadRequest,
                "Invalid " + ENTITY_NAME +
                " object passed to POST method.");
    }
  } catch (Exception ex) {
    ret = HandleException(ex,
          "Exception trying to insert a new " + ENTITY_NAME + ".");
  }

  return ret;
}
Go back to the HTML project and add the code shown in Listing 11 to your index page. This new function called insertProductUsingSerialize() builds a url variable by using the URL constant and adding the value you used in the Route() attribute in Listing 10. You then build the url-encoded string by calling the .serialize() method on the form object. For submitting the data to the Web API method, use the jQuery $.post() method and pass in the url variable plus a question mark (?) plus the string created from the .serialize() method. Remember that the default Content Type for the $.post() method is a url-encoded string.
function insertProductUsingSerialize() {
  let url = URL + "/ProductQuery";

  // Create a url-encoded key/value pair to pass on the URL
  // &nameAttribute=value&nameAttribute=value... etc.
  let product = $("form").serialize();

  // Add key/value pair to URL
  $.post(url + "?" + product)
    .done(function (data) {
      displayMessage("Product Inserted using serialize()");
      console.log(data);
      setInput(data);
    })
    .fail(function (error) {
      handleAjaxError(error);
    })
    .always(function () {
      // Anything you want to happen here on either fail or done
    });
}
To call this insertProductUsingSerialize() function, add a new button below the other buttons on the index page that looks like the following:
<button type="button" onclick="insertProductUsingSerialize();">
  Insert using Serialize
</button>
Try it Out
Save all the changes you made to both the Web API project and the HTML project. Restart the Web API project so the compiler can rebuild the ProductController with the new method. Go back to the browser and click on the Insert using Serialize button. Remember to delete any records you added in the previous section.
jQuery .param() Method
The jQuery .param() method takes a JSON object, such as the one you build in the getFromInput() function you created, and performs a .serialize() on it to convert it to a url-encoded string that you can send to the Post method you created in the last section. Open the index page and add a new function named insertProductUsingParam() as shown in Listing 12.
In this function you build the url variable using the URL constant plus the value you created in the Route() attribute shown in Listing 10. Build a JSON object by calling the getFromInput() function you built earlier in this blog post series. There is an issue with the .param() and data input fields. When the .param() function converts the JSON object into a url-encoded string, any date fields will not convert correctly. Make sure you convert any date fields into a format that will work such as toUTCString() or toLocaleDateString() prior to calling the $.param() method.
function insertProductUsingParam() {
  let url = URL + "/ProductQuery";

  // Get JSON object
  let tmp = getFromInput();

  // Modify the SellStartDate otherwise $.param() will
  // not create the correct date/time for submitting
  tmp.sellStartDate = tmp.sellStartDate.toUTCString();

  // "serialize()" the JSON object
  let product = $.param(tmp);

  // Add key/value pair to URL
  $.post(url + "?" + product)
    .done(function (data) {
      displayMessage("Product Inserted using param()");
      console.log(data);
      setInput(data);
    })
    .fail(function (error) {
      handleAjaxError(error);
    })
    .always(function () {
      // Anything you want to happen here on either fail or done
    });
}
To call this insertProductUsingParam() function, add a new button below the other buttons on the index page that looks like the following:
<button type="button" onclick="insertProductUsingParam();">
  Insert using Param
</button>
Try it Out
Save all the changes you made to both the Web API project and the HTML project. Restart the Web API project so the compiler can rebuild the ProductController with the new method. Go back to the browser and click on the Insert using Param button. Remember to delete any records you added in the previous section.
FormData Object
The last option for taking form data and submitting it to a Web API is to use the FormData object. FormData creates an array of key/value pairs that work the same as submitting a form with the encoding type set to "multipart/form-data". For example, if you have the following <form> element with several input elements:
<form id="myForm">
  <input ...>
  <input ...>
</form>
To build a key/value pair from the inputs using this <form> element, you can write the either of the following lines of code depending on if you use jQuery or JavaScript.
// Using jQuery
let product = new FormData($("#myForm")[0]);

// Using JavaScript
let product = new FormData(document.getElementById("myForm"));
If you wish to see the values in the product variable, use the following code:
for(var pair of product.entries()) {
  console.log(pair[0]+ ', '+ pair[1]);
}
The value in the [0] element of the array is the name of the property, the value in the [1] element of the array is the value of the property. These are the values that you can send through the $.ajax() method to a Web API method.
Go to the Web API project and create a new Web API method shown in Listing 13. The only difference between this API call and the original one you wrote is the Route() attribute added to give it a unique route and the [FromForm] attribute added before the Product entity argument. .NET Core looks at the [FromForm] attribute and knows to look into the Request.Form collection for an array of key/value pairs which it can use to map to the Product object.
[HttpPost()]
[Route("ProductFormData")]
public IActionResult PostFormData([FromForm] Product entity) {
  IActionResult ret = null;

  try {
    if (entity != null) {
      // Fill in required fields not used by client
      entity.ProductCategoryID = 18;
      entity.ProductModelID = 6;
      entity.rowguid = Guid.NewGuid();
      entity.ModifiedDate = DateTime.Now;

      _DbContext.Products.Add(entity);
      _DbContext.SaveChanges();
      ret = StatusCode(StatusCodes.Status201Created, entity);
    } else {
      ret = StatusCode(StatusCodes.Status400BadRequest,
                "Invalid " + ENTITY_NAME + " object passed to POST method.");
    }
  } catch (Exception ex) {
    ret = HandleException(ex,
              "Exception trying to insert a new " + ENTITY_NAME + ".");
  }

  return ret;
}
Go back to your HTML project and add a new function named insertProductUsingFormData() as shown in Listing 14. Create a variable named url which combines the constant URL with the value you put into the Route() attribute in Listing 13. Next, build the FormData object by retrieving the inputs within the <form> tag. In the settings object you pass to the $.ajax() method, set the contentType and processData properties to false. This is necessary to allow the FormData object to be passed in the correct format. Also, do not use the JSON.stringify() method on the FormData object when setting the data property.
function insertProductUsingFormData() {
  let url = URL + "/ProductFormData";

  // Create a key/value pair of inputs within <form>
  let product = new FormData($("form")[0]);

  // Set 'contentType' and 'processData' to false
  // to put the 'data' into the Request.Form object
  // DO NOT JSON.stringify() the data
  $.ajax({
    url: url,
    type: "POST",
    contentType: false,
    processData: false,
    data: product
  })
    .done(function (data) {
      displayMessage("Product Inserted using FormData");
      console.log(data);
      setInput(data);
    })
    .fail(function (error) {
      handleAjaxError(error);
    })
    .always(function () {
      // Anything you want to happen here on either fail or done
    });
}
Add a new button just under the buttons on the index page that looks like the following code:
<button type="button" onclick="insertProductUsingFormData();">
  Insert using Form Data
</button>
Try it Out
Save all the changes you made to both the Web API project and the HTML project. Restart the Web API project so the compiler can rebuild the ProductController with the new method. Go back to the browser and click on the Insert using Form Data button. Remember to delete any records you added in the previous section.
Summary
This blog post showed you how to submit user input data to a back-end Web API using several different methods. You should choose one of these methods and use it consistently as opposed to using them all. As with anything in programming, there are always a myriad of ways to accomplish the same task. If you are having to write front-end code to a back-end server that you do not have control over, you may need to use one of the methods to get the data into the format required by the Web API calls.
Sample Code
You can download the complete sample code at my https://github.com/PaulDSheriff/BlogPosts page.
#jquery #ajax #javascript #pauldsheriff #development #programming